Using a cloud storage service like Google Drive has plenty of advantages. It not only helps you to save some storage space on a smartphone/computer, but it also serves as a great backup option. If you have been using Google Drive for a while, you might know that the cloud-based service allows you to upload or create files on Google Drive. Not only that, but you can also share your saved files with others. By default, you are the owner of any file you upload or create on Google Drive. However, there are times when we want to transfer the ownership of a file to someone else.
Steps to Change Ownership of a File/Folder in Google Drive
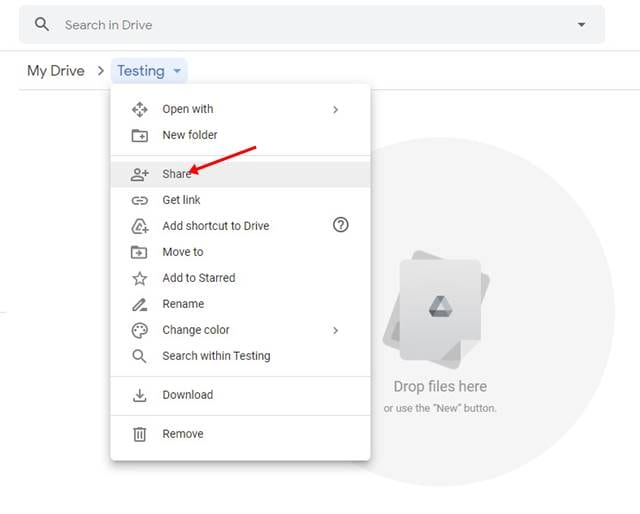
So, if you are also searching for ways to change the owner of a file in Google Drive, you are reading the right guide. In this article, we will share a step-by-step guide on how to change the owner of a file in Google Drive. Let’s check out. Step 1. First of all, open your Google Chrome browser and head to the Google Drive homepage. Step 2. Now on Google Drive, select the folder or file to transfer the ownership. Step 3. Now click on the drop-down menu as shown below and click on ‘Share‘
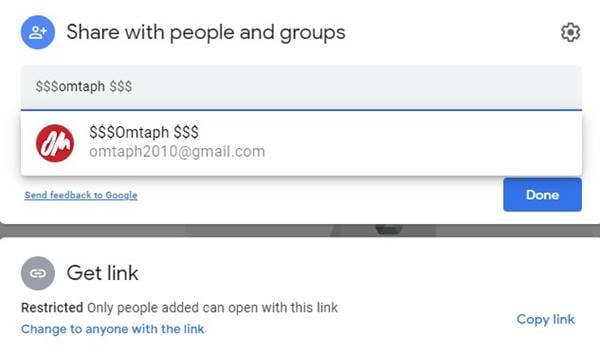
Step 4. Next, enter a valid email address. Once added, click on the ‘Done‘ button.
Step 5. Next, click on the ‘Shared‘ button, as shown in the screenshot below.
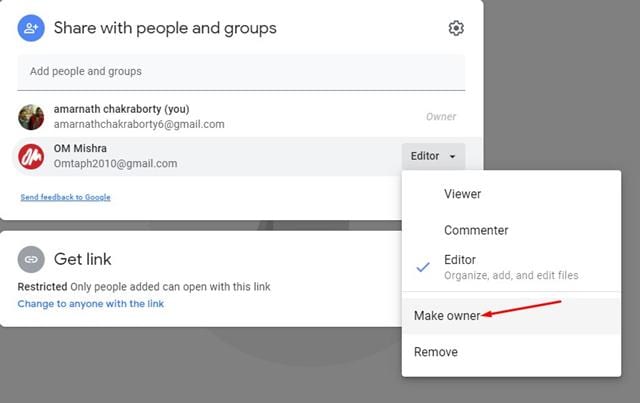
Step 6. Now, click on the drop-down box corresponding with the person you’re transferring ownership of. Next, click on the ‘Make Owner’ option.
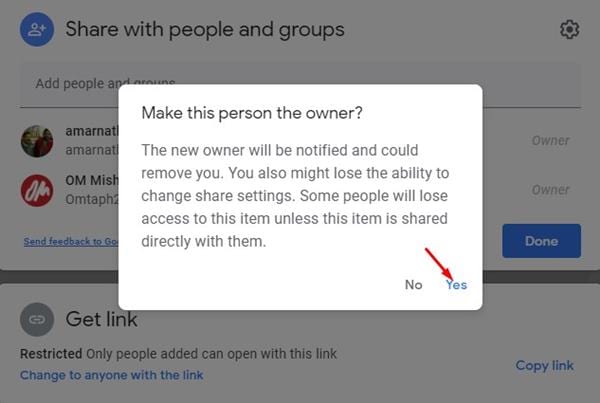
Step 7. On the confirmation popup, click on the ‘Yes‘ button.
Note: Once you transfer ownership of a file, you won’t be able to revoke the changes yourself. So, double-check before transferring the ownership. That’s it! You are done. This is how you can change the file owner in Google Drive. So, this guide is all about changing the owner of a file in Google Drive. I hope this article helped you! Please share it with your friends also. If you have any doubts related to this, let us know in the comment box below.
Δ
